How to create a Form
First login to your account using the username and password provided to you by your administrator. After the login, the first page you will see is your main form page. From here you can manage forms using the folder system, and track results and respondents.
.jpg?inst-v=5c056e1e-ae23-46ea-99ee-f3d1279e23b0)
On the Folders Panel on the left of your screen you can create custom folders for different forms to keep them structured and ordered in the way you need. By default you will use the Main folder to create your first form.
Click the +New Form button to create a new form. Next you’ll see a Create a new form pop-up with the list of different options for a form creation:
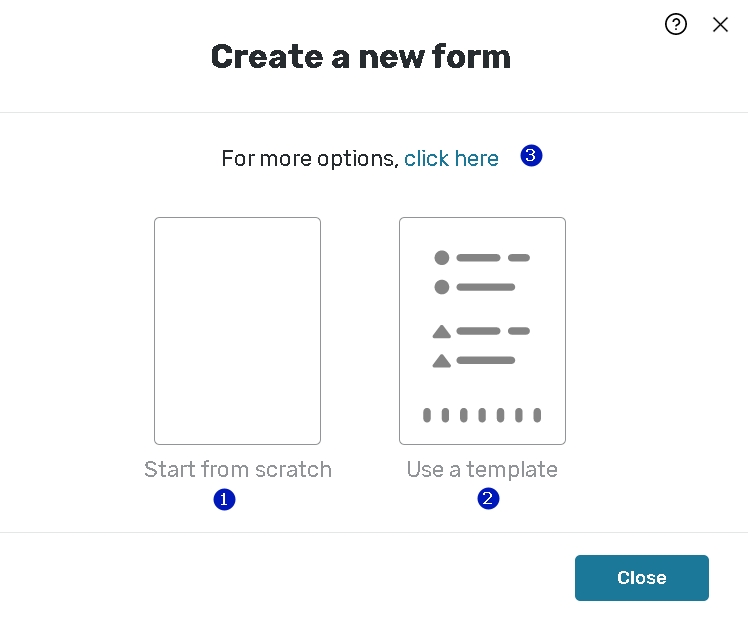
1. Start from scratch - use this option if you want to create a form by manually adding questions and logic setups.
2. Use a template - this option gives you an access to the library of form templates split into different categories.
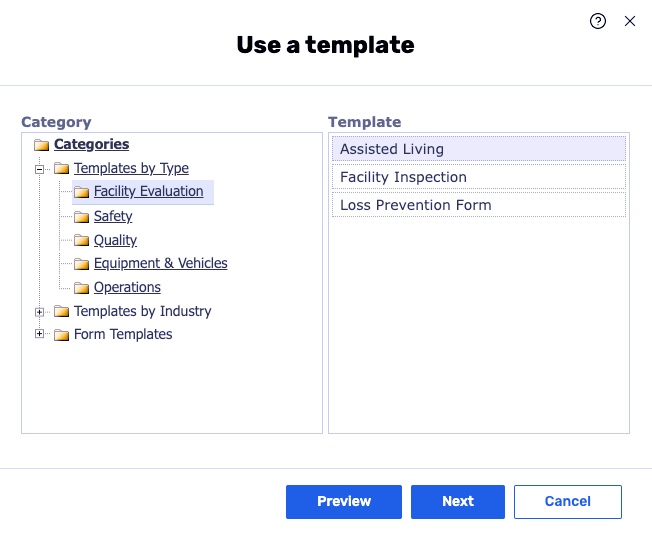
Select a category from the Category list box. Then, select a template from the Template list box.
Click the Preview button to take a look at the survey template.
Once you find one you like, you can continue by clicking the Next button.
3. Other options - these options are the following:
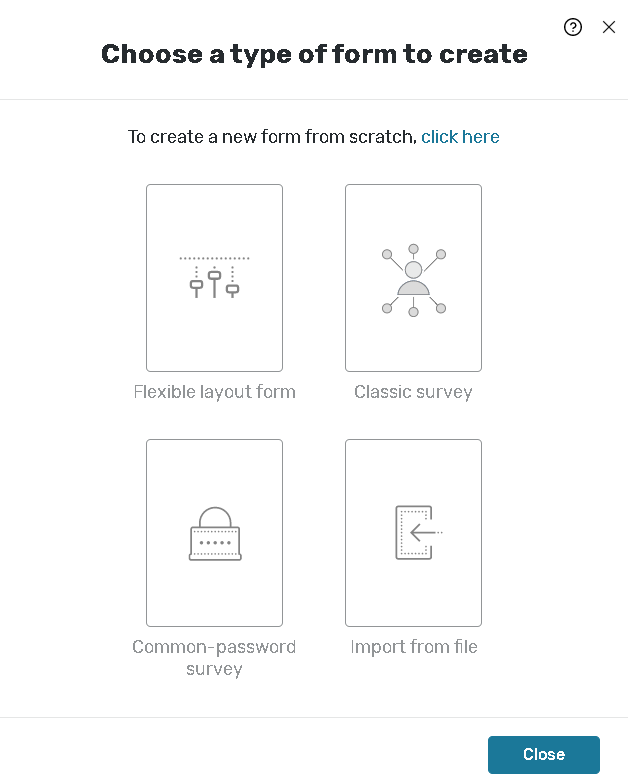
Flexible layout form - creates questions with a fully configurable layout. All elements are drag and drop to make your form look exactly as a paper based original.
Flexible layout form - legacy feature without support or any fixes.
We recommend to work with the Flexible layout form on the device with 100% display and browser settings.
Classic survey - a classic version of a non-linear form.
Common-password survey - use this option to conduct a Teacher-Student survey group as well as storing profile information and profile codes, as well as linking it to any other normal survey in your account. For more details consult the Common-Password Survey help chapter.
Import from file - you can import a form from an external data file using the custom text format.
Choose a Start from scratch option. Now you can see a linear form in its basic state. It is here that you will build your form by adding questions, applying logical transitions, etc. We will go into this more in later chapters.
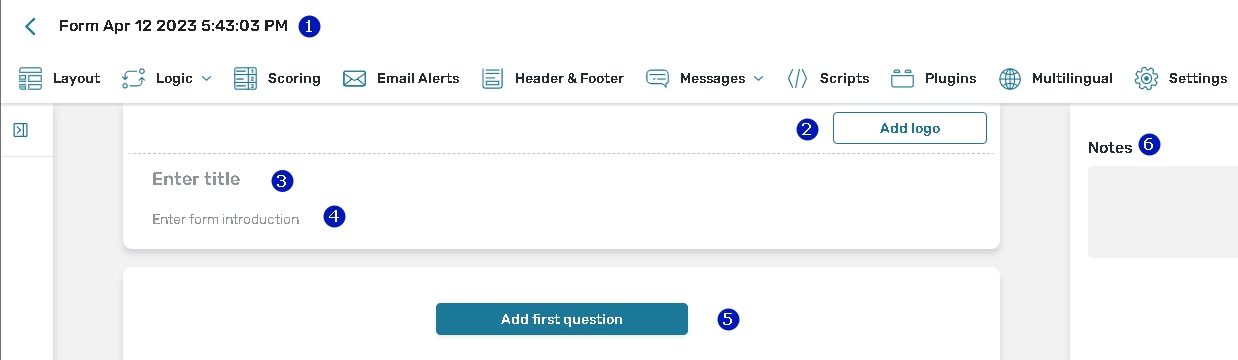
Change the form name (must be unique). The form has a predefined name – its date and time of creation.
The Add logo button allows you to add a logo to the form to meet your company or product's design;
Change the form title (optional);
Enter a form introduction (optional);
Click the +Add first question button to create a question.
Add internal notes (optional);
Please read theHow to Create a Form with Form Builder for more information.