Sync options
Once you update any form or data on the server, you need your users to complete the sync to get these updates. Or you see that some users haven’t synced for an extended period of time and could miss any previous updates.
To resolve these issues, we introduce a new ability to inform iOS and Android application users about the need for sync.
How does it work?
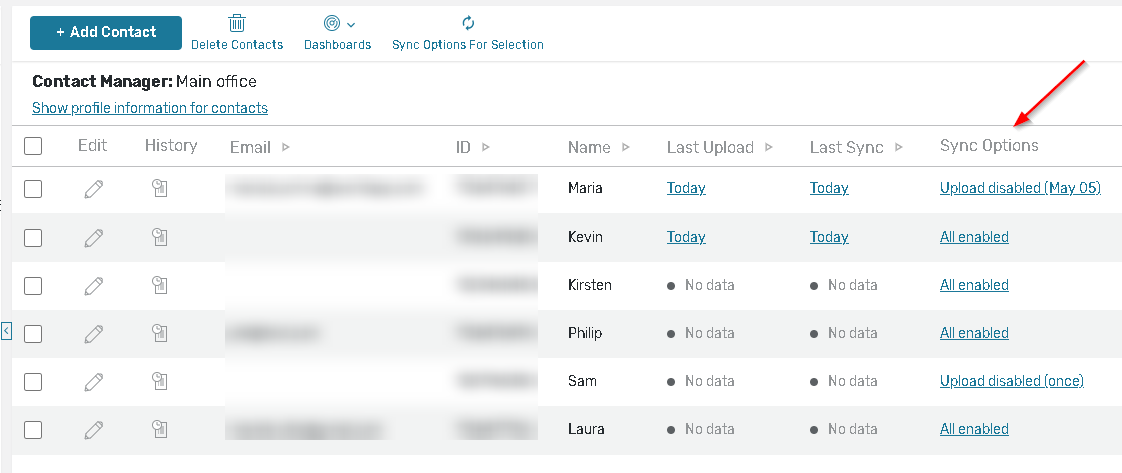
To see what options are set for your users, go to the ‘Show detailed information’ tab in the Contacts table and check ‘Sync options’ column.

2. To update the Sync options of a contact, click on its option in the line.
3. In the Sync option dialog, there are 3 options to choose from:
‘All enabled' - the sync dialog in the apps would include all options enabled: ‘Sync’ and ‘Upload all’.
Disable the ‘Upload all’ sync option within N days - the sync dialog has a note that the ‘Upload all’ option will be blocked in N days, once the N day comes, it becomes disabled in the dialog until next sync.
Disable the ‘Upload all’ sync option until next sync - the sync dialog has ‘Upload all’ option disabled until the contact completes the sync and the appropriate hint why it is disabled.
When you block the ‘Upload all’ button, it means that you allow users only to complete the sync that lasts longer than upload.
If one of the disabling options has been chosen, once the contact syncs successfully the "Upload all" will be enabled back automatically.
.png?inst-v=955f8bd8-7a38-40d6-9236-ce0b960f934b)
4. You can request your user to do the sync by sending him the push notification. Just choose an option and click on ‘Notify’.
The push notification has a default message, but you can edit it by your own with the limitation in symbols for 30 for the title and 40 for the push text.
.png?inst-v=955f8bd8-7a38-40d6-9236-ce0b960f934b)
The limitation in ‘Upload all’ sync options or sync request by the Admin doesn’t block the user from using the app without sync.
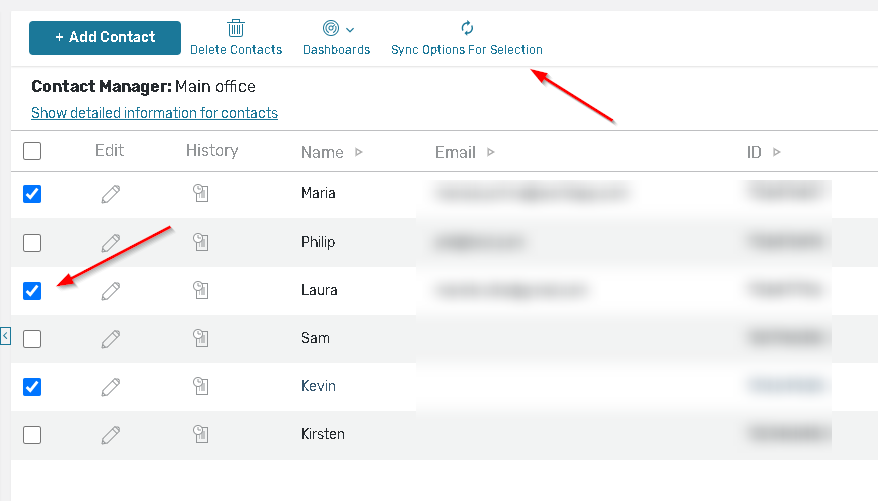
5. If you need to edit the sync options or send the push notification in a bulk, choose the contacts you need in the list and use the ‘Sync options for selection’ button in the header.

