Home Tab
The Home tab contains the primary features for editing the Custom form, such as:

Adding new questions (1)
Renaming the form (2)
Styles page with form design options (3)
Adding logo and images (4)
Defining form settings (5)
Adding special messages to the form (6) – Welcome Back, Header and Footer, Thank you page and Internal notes.
Applying plugins (7)
The following plugins do not work with forms:
– Section Randomization
– Question Randomization
– Select All Checkbox
– Fixed Header for Rate and Matrix Questions.
Advanced interactivity and functionality can be added with the help of Javascript. Such scripts should be inserted into the Scripts section (8)
Previewing and testing the form (9)
Printing the form (10) launching (11)
All these features work with custom forms in the exact way they work with surveys. But there are also features unique to the Custom Form Builder:
.jpg?inst-v=5c056e1e-ae23-46ea-99ee-f3d1279e23b0)
The Save (1) button saves changes applied to your form at any time it is clicked.
The Undo (2) button allows you to revert the last changes applied to the form one at a time; the Redo (3) button applies the undone changes back.
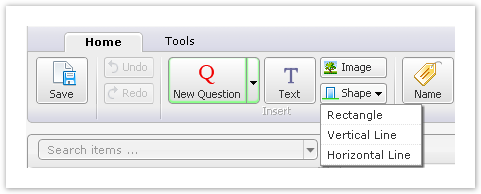
The Text (4) button creates an empty text field on the grid so you could insert additional sub-header, notes or instructions if needed. Such text objects appear under the Other text section on the left pane.
The Shape button (5) is used to add three types of shapes: Rectangle, Vertical Line, and Horizontal Line.
Use Page Format (6) to change properties of the form pages.
Use New Page (7) to add another page to the form. When you have more than one page, navigation controls appear just above the grid. Use Page Order (8) to rearrange the form pages and Delete Page (9) to remove the current page.
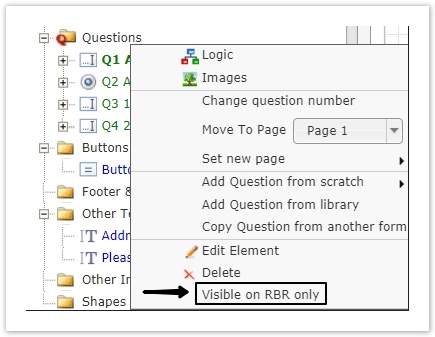
Password protected forms must have the password question added to the form. Right-click on an element in the tree and choose the Visible on RBR only option if you want to have this field hidden once answered by the respondent.
The Shape button
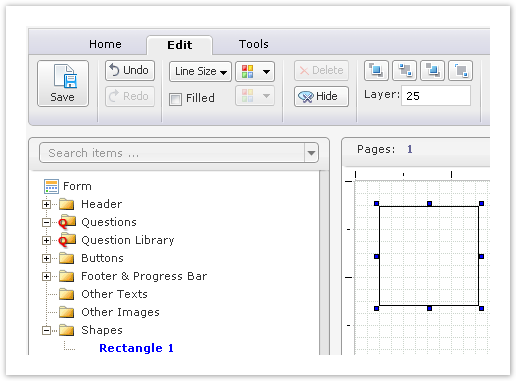
Sometimes it is necessary to add additional lines or frames to your form layout. When a shape on the form is selected, the ribbon toolbar automatically switches to the Edit tab, showing controls for editing the shape.
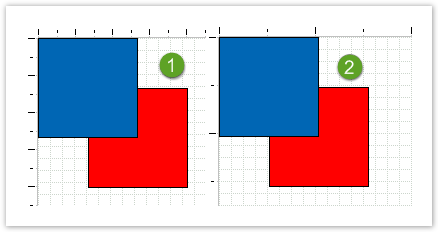
3 elements are available here: Rectangles, Vertical and Horizontal lines. To insert the element click on Shape and select a type. Once you choose an object it appears on the grid. Right after creation it has default size and color, but a special set of controls allows you to re-size and format your element easily:
Line Size (1) sets the thickness of the line the shape is drawn with, and the color selector (2) next to it sets the line color. When working with a rectangle, you can activate the Filled check box (3) and use the second color selector (4) to choose the fill color.
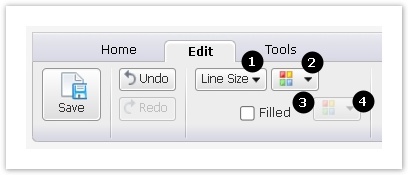
Shapes do not appear in form reports.
Page format button
Page formatting allows you to set additional page settings. Upon clicking on the Page Format button, a Page settings pop-up box will appear.
These settings apply to all pages of the form.
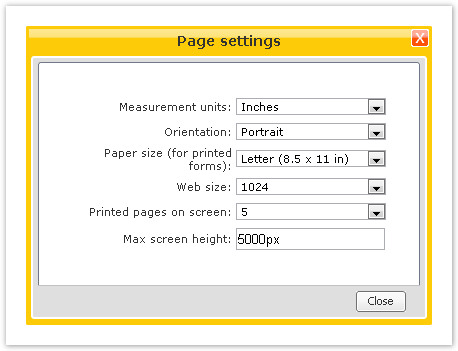
Measurement units is used to set the grid rulers to centimeters (1) or inches (2).
Orientation can be either Portrait (paper set vertically) or Landscape (paper set horizontally).
Paper size options are useful for printed forms. Select the format you are going to print the form in and green grid guides will adjust automatically. Note that the elements placed outside the green guide lines will still be visible on the form.
The Web size option activates a blue guide line on the grid. This line assists in designing a form of a certain width.
The Printed pages on screen option changes the grid size to include the number of pages selected.
These settings are not related to the number of pages of the online form.
The Max screen height value sets the height of the blue guide line at the far right of the grid. This is a helpful guide for staying within size constraints imposed by other factors, such as other content on a web page where the form will be displayed.