Tools Tab
The third tab on the ribbon toolbar has advanced design features. Using them can save you time and help you with precise form building.
Grid

The grid size (1) and brightness (2) can be adjusted using the provided dropdowns. Size options include both inches and centimeters.
The grid can be disabled by selecting No grid in the Grid size dropdown.
If Snap objects to grid is enabled, it will still work with Brightness set to 0% when the grid is enabled.
Guides
Guides are only visible in the Form Builder. They are not shown in Preview mode or in the live form.
Guides (3) are custom grid lines that make it easier to align objects. They can be added, moved or disabled at any time.
To customize them, click the Guides button (3). Activate the check boxes for the horizontal and vertical guides you would like to see.
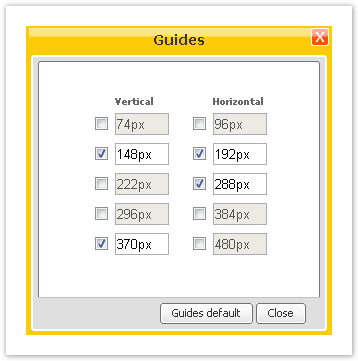
Change the pixel value for an active guide to adjust its position. Click the Guides default button to revert to the original guide settings. Click the Close button when finished editing the Guides settings.
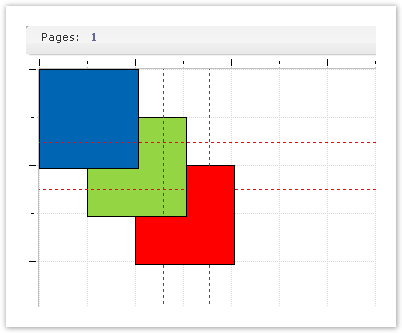
On the grid, visible guides can be dragged to change their position.
Snapping Objects
Snapping can be used to precisely align multiple elements on the form by dragging them.
There are three snap methods available:
Snap objects to grid – The selected object automatically snaps to the nearest grid lines.
Snap object to guides – The selected object automatically snaps to the nearest available guide lines.
If you would like to snap the element to a certain guide line, move it toward this line until the guide becomes a solid line.
Snap guides to grid – The selected guide line automatically snaps to the nearest grid line.
Snapping can be activated or deactivated at any time by checking or unchecking the appropriate options. Note that when both Snap objects to grid and Snap objects to guides are activated, the selected object will snap to the nearest line of either type when dragging it.
Move and Resize
Another way to adjust the position and size of an object is through using the Move and resize button.
.png?inst-v=5c056e1e-ae23-46ea-99ee-f3d1279e23b0)
Move arrows (1) – These move the selected object in the indicated direction, one pixel at a time
Resize arrows (2) – These resize the selected object by moving the edge corresponding to the arrow position, one pixel at a time. Note that the mode of these buttons can be toggled using the Make larger and Make smaller buttons (3)
The Width, Height, and All buttons will proportionally resize an object either smaller or larger, depending on which button is selected above. Since both or all edges are moved by this, the height and/or width changes by two pixels at a time
The Lock position and size button will freeze the selected object in place, preventing any accidental change to its size or position. Its handles will turn red to indicate it is locked
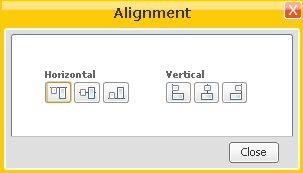
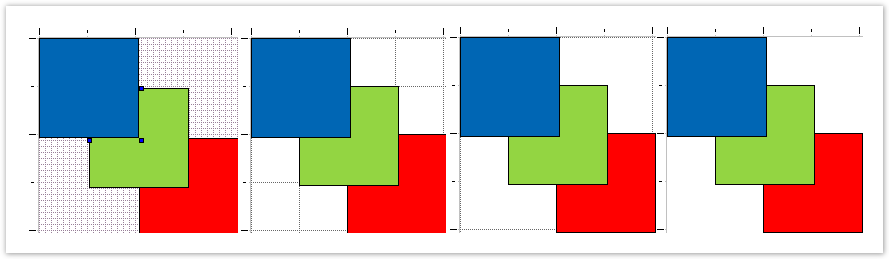
Alignment
When you have a group of elements on the grid, you can easily align them to the left, right, bottom, top or center using the Alignment option.