Multiple Object Lookup
This article describes the Multiple Object Lookup question purpose, functions, Must Answer settings and its specific and additional settings.
Description
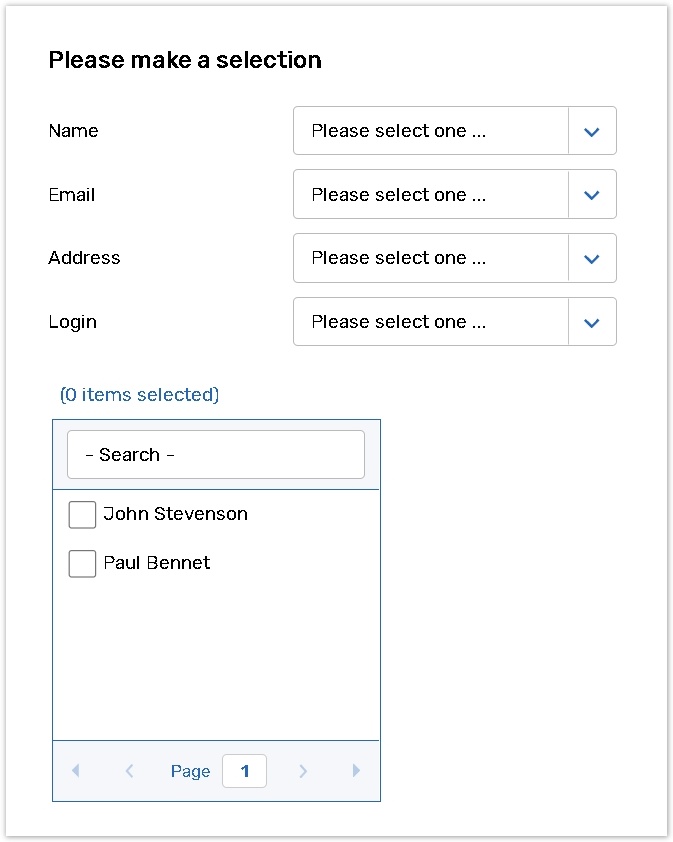
Use this question type if you want your respondents to select one or multiple objects from the list by specifying other parameter details in a dropdown(or multiple dropdowns) if needed.
List of all available answer choices is displayed as a checkboxes.
Data in these dropdowns is transferred from the selected columns of the custom data models or contact managers created in your account.
How to create Multiple Object Lookup question
To add the first question to your form:
Click the Add first question button to add this question type.
.png?inst-v=955f8bd8-7a38-40d6-9236-ce0b960f934b)
To add a question to the already existing form:
Click the '+' button on the Central panel, then select the question from the dropdown menu;
.jpg?inst-v=955f8bd8-7a38-40d6-9236-ce0b960f934b)
Type your question text in the Enter text here text box.
Select data object menu is opened automatically.
Choose one of the Data sources (Data Model or Contact Manager), and select the Data object;
.png?inst-v=955f8bd8-7a38-40d6-9236-ce0b960f934b)
In case you select a nested group of the Data source, the central panel displays the whole chain of the group.
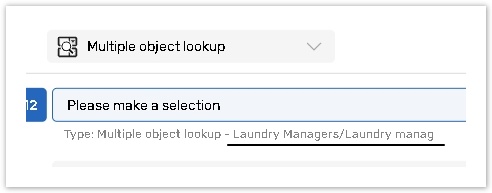
The right panel displays only the name of the chosen Data source.
.png?inst-v=955f8bd8-7a38-40d6-9236-ce0b960f934b)
Type your question text in the Enter text here text box;
If you want to change your Data source, click the Select data object button in the right panel;
.png?inst-v=955f8bd8-7a38-40d6-9236-ce0b960f934b)
If you want to change your Data source, click the Select data object button in the right panel;
You can type the Selection field label in the central panel.
.png?inst-v=955f8bd8-7a38-40d6-9236-ce0b960f934b)
Type your question text in the Enter text here text box;
If you want to change your Data source, click the Select data object button in the right panel;
You cannot change the Data source if there is at least 1 response to the question.
All changes are saved automatically.
Checkboxes settings
In the right panel, you can set up a limit of checkboxes (answer choices) per page for your responders.
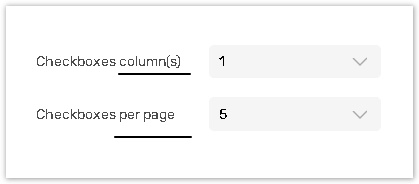
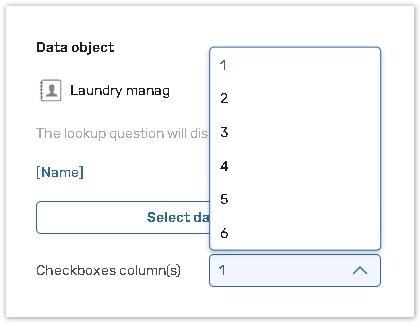
Checkboxes column(s): Select a checkboxes layout in the survey for your respondents from the dropdown list;
Checkboxes per page: Select the number of checkboxes per page from the dropdown list.
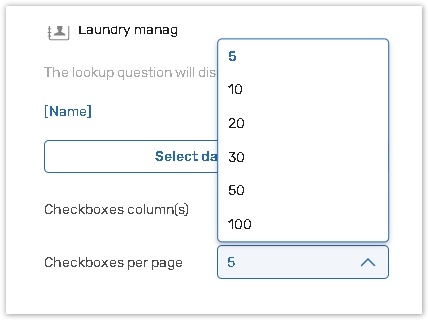
Both of these dropdown menus change dynamically by the following formula (6 options in general):
Multiple Object Lookup specific settings
Set logical filters
The Logical Filter allows the respondent to select only from the filtered answer choices which fit into the indicated category of AND/OR Logic, Field Name, Condition and Form Answer.
Click the Logical filter button in the right panel.
.png?inst-v=955f8bd8-7a38-40d6-9236-ce0b960f934b)
Click the +Add rule button.
.png?inst-v=955f8bd8-7a38-40d6-9236-ce0b960f934b)
Now you can add 1 or more logical rules.
General field format:
equals
does not equal
contains
does not contain
in
not in
2. Numeric field format:
equals
does not equal
in
not in
greater than
greater than or equals to
less than
less than or equals to
The central panel will display the Logical Filter as a filter icon.
Hover over the icon to see logical filters. Filters conditions are displayed in the following icons:
.png?inst-v=955f8bd8-7a38-40d6-9236-ce0b960f934b)
"In" and "Not in" conditions allow to check whether the value, stored in the Data Model or Contact manager is/is not among several values, located within the general or numeric question field. Numerous options can be specified in a form field with the help of divider |. For example, if one of the columns in your Contact Manager or Data Model stores numbers from 1 to 5, and in your Object Lookup question you wish to show only those data objects which have the value of 1, 3 or 5, you may set up a filter based on the Single line question to which the value: 1|3|5 can be set. The Single Line question may be hidden and prepopulated with the help of Set Value feature or Data Flow.
To add a Lookup Field
You can adjust lookup fields to filter relevant answer options from your data source.
Click the +Add lookup field button in the central panel.
.png?inst-v=955f8bd8-7a38-40d6-9236-ce0b960f934b)
Type your in empty text boxes;
Select lookup fields from the drop-down menu.
.png?inst-v=955f8bd8-7a38-40d6-9236-ce0b960f934b)
Name formula
Click on the name formula in the right panel.
.jpg?inst-v=955f8bd8-7a38-40d6-9236-ce0b960f934b)
Your respondents see values from the data source selected according to the name formula, or name format configured on the data source level.
Use this setting to customize the values names from the selected data source for the respondents.
.png?inst-v=955f8bd8-7a38-40d6-9236-ce0b960f934b)
Once you click on the formula, the system displays the Name formula dialog.
To add a new row for formula parameters configuration click the +Add tag (3) button.
.png?inst-v=955f8bd8-7a38-40d6-9236-ce0b960f934b)
The dialog consists of the left and right column.
The left column:
.png?inst-v=955f8bd8-7a38-40d6-9236-ce0b960f934b)
Type of parameter column with dropdown menu:
Pre-selected Data source name (default option);
'Text' option – allows you to establish your own parameter value in the right column.
The right column:
.png?inst-v=955f8bd8-7a38-40d6-9236-ce0b960f934b)
Parameter value column.
If you choose the data source name in the left column, you can select a parameter value from the dropdown menu.
All values are sorted according to their position in the data source.
If you choose the 'Text' option in the right column, you can create your own parameter value in the left column.
Your respondents will see a parameter value created by you.
.png?inst-v=955f8bd8-7a38-40d6-9236-ce0b960f934b)
.png?inst-v=955f8bd8-7a38-40d6-9236-ce0b960f934b)
Must answer settings
This question type has Basic Must Answer settings.
Click here to read about the Must Answer settings.
The Additional must answer settings include:
Required to fill
Turn the Required to fill toggle on and select an option from the dropdown menu to indicate the number of mandatory answer options.
.jpg?inst-v=955f8bd8-7a38-40d6-9236-ce0b960f934b)
Additional common question and answer option settings
This question type has additional common question and answer option settings.
Please read the articles for more details.
Question analysis code
Question identifier;
See the table of all available additional features depending on question types.
